Aluminum railings are lightweight, strong, and easy to assemble — making them one of the best DIY railing options for homeowners. Here’s a step-by-step guide on how to install them yourself, what tools you’ll need, how long it usually takes, and tips for choosing the right railing system.
1️⃣ Tools You’ll Need
✅ Measuring tape – precise measurements are key.
✅ Level – to keep posts and rails perfectly straight.
✅ Electric drill/screwdriver – with bits for metal or masonry, depending on where you’re mounting.
✅ Wrenches or socket set – for bolts.
✅ Masonry drill bits – if installing on concrete.
✅ Rubber mallet – helps adjust parts without scratching.
✅ Pencil or chalk line – for marking where posts go.
✅ Safety gear – gloves, safety glasses, ear protection.

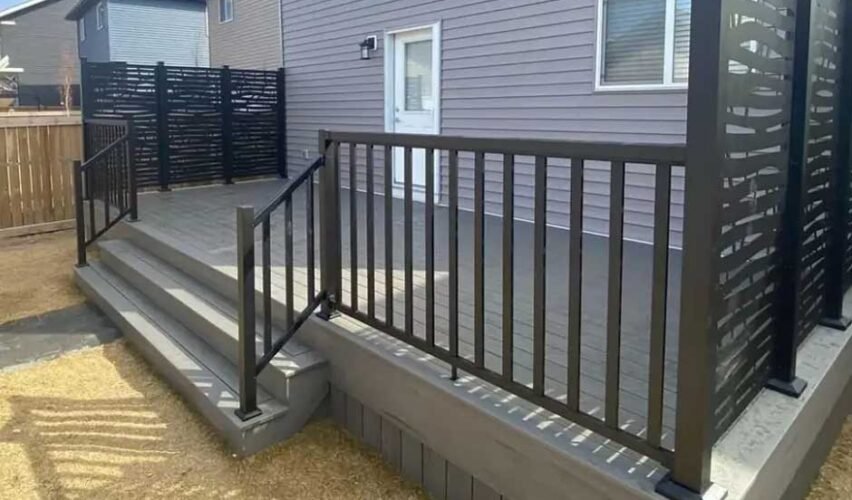
2️⃣ How to Choose the Right Aluminum Railings
Code compliance – check local building codes for required height (usually 36–42 inches) and spacing (pickets typically max 4 inches apart).
Pre-assembled vs. kits – some brands offer pre-assembled panels that are faster to install but harder to customize. Kits take more time but give you flexibility.
Finish & color – powder-coated aluminum resists scratches and fading better than painted options.
Mounting style – surface mount (on top of the deck) or fascia mount (on the side). Choose based on your deck or stair design.
For trusted railing options, check this out .
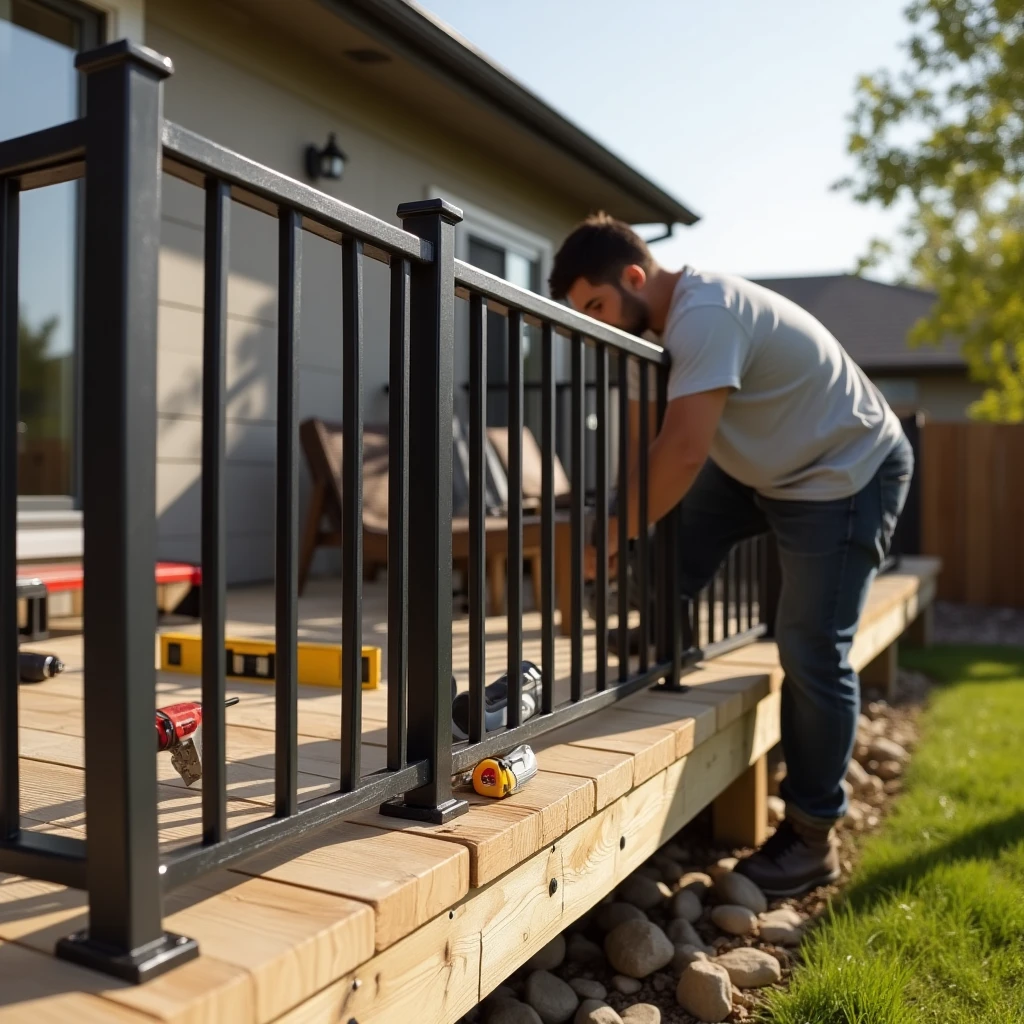
3️⃣ Installation Steps
✅ Plan your layout. Mark post locations on your deck, stairs, or balcony. Measure twice so spacing is even and meets code.
✅ Install posts first. Drill holes for post bases, anchor them with lag bolts or concrete anchors. Ensure each post is level vertically.
✅ Attach bottom rails. Slide or screw them into place according to your railing system’s instructions.
✅ Insert pickets or glass panels. Align them carefully — uneven spacing can cause code issues.
✅ Attach top rails. Secure them to posts or pickets, double-checking everything is level.
✅ Tighten all fasteners. Go over each screw and bolt so the system is secure.
✅ Final inspection. Shake the railing lightly to make sure it’s solid.
⏳ How Much Time Will It Take?
For an average balcony or small deck (10–15 feet of railing), installation takes:
- 1 day (4–6 hours) for experienced DIYers,
- 1–2 days if you’re new to DIY projects.
Larger or more complex installations (e.g., stairs with angles) can take longer.
✅ Pro Tips
- Mark post positions precisely before drilling.
- Dry-fit all components before final tightening.
- If cutting rails or pickets, cover ends with matching touch-up paint or end caps to prevent corrosion.
With patience and the right tools, installing aluminum railings yourself can save money and give your home a stylish, safe upgrade.